
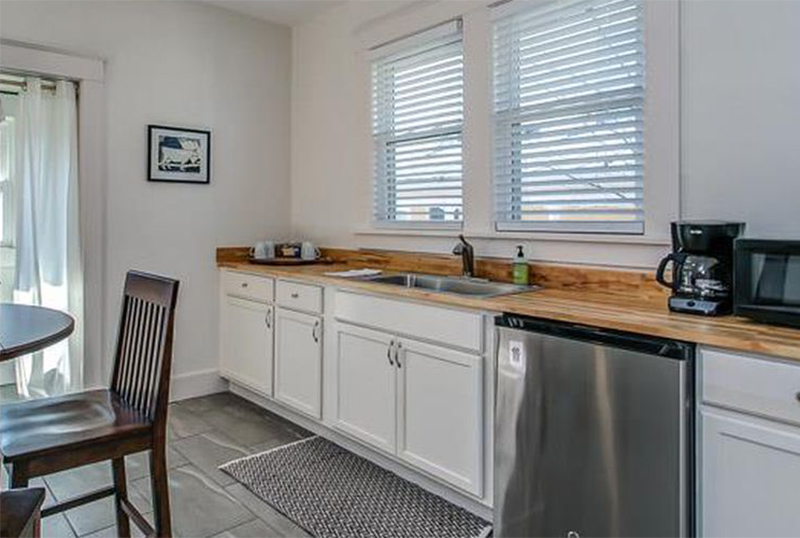
Part of the reason why I believe I was able to buy my 1930s Craftsman in 2018 was though the market was hot at the time, there didn’t appear to be a lot of competition. I believe it was because the house was listed as a single-family home but was laid out like a duplex. Those looking for a single-family home, probably thought it would take a lot of work to convert it back and no one else knew this listing had income potential. The previous owner had rented one side and used the other side as a short-term rental. I knew that I could do something similar. I rented one side and I moved into the short-term rental side so that I could get to work on it.
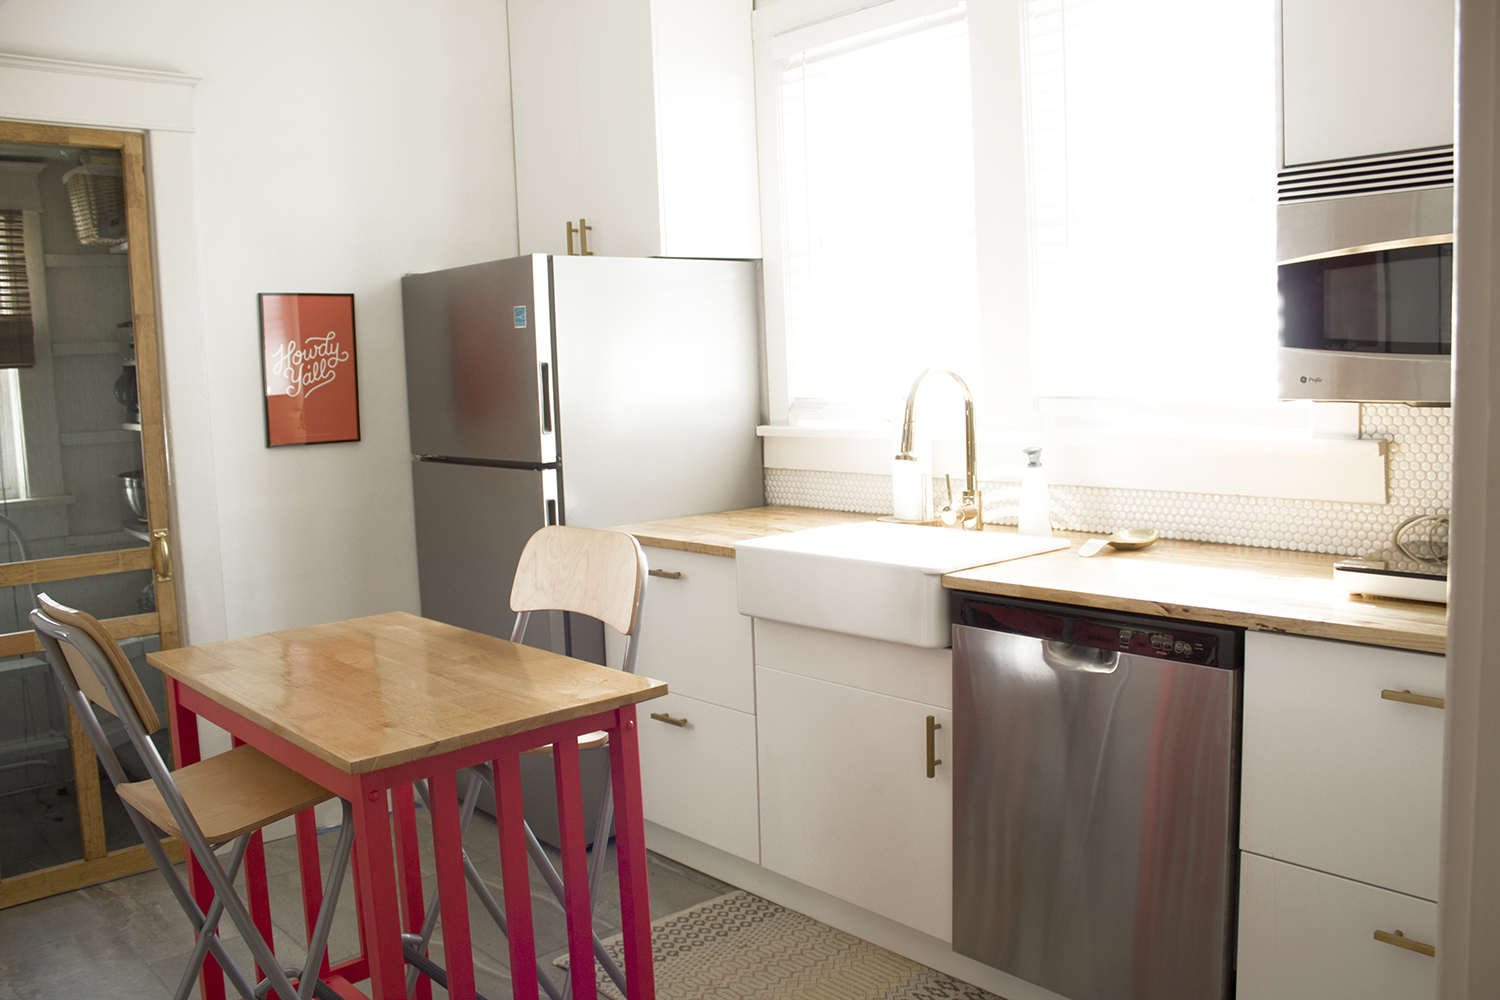
The short-term rental side only had a kitchenette. It had a sink and a small refrigerator. I immediately started dreaming of big plans for the space. I wanted to have the option to rent out the space as a short-term or long-term rental so it needed to have a full-size kitchen. But since the space was just big enough for one person long-term or two people short-term, the kitchen wouldn’t have to be a big one.
All the best plans
My first thoughts went to saving and re-using the cabinets and countertop. I began measuring and trying to figure out how to add appliances to the space. I wanted to buy the Ikea Domsjo sink because I love it and also because I could cut the existing countertop into pieces and fit it on either side of the sink, but come to find out the sink had been discontinued. This changed everything. I had to scrap the idea of reuse and instead buy a new countertop to accommodate a different sink and all the appliances. I couldn’t find a way to make the cabinets work either. So on a shoestring budget, I knew that Ikea cabinets were the way to go.
As I started picking items out, I quickly realized I would have to make more compromises. I wanted a shaker-style cabinet door because I thought that it would go best in my Craftsman cottage. However, Ikea’s shaker-style doors only come in an off-white and I wanted bright white cabinets. I thought I would put install a cooktop and convection oven/microwave. However, the total space to the right of the sink cabinet is 52″. Cabinets come in 18″, 24″, and 36″. A 36″ cooktop with an 18″ cabinet would throw off the center measurement of the layout. The sink centered and a 36″ cooktop to the right would only leave a 16″ hole for a cabinet between them. So I opted to go without a permanent cooktop and chose two induction burners and a convection oven. (How often does a single person use more than two burners at a time, I reasoned.)
A three-hour drive to Memphis during Ikea’s Kitchen Event and I had everything ordered that I could purchase there. Ordering during this event saved me 10% and gave me free freight. I ordered the appliances, sink, cabinets, and countertop. I found the brass faucet and a great deal on the brass cabinet pulls online. My best deal was finding the almost new $1,000 convection oven on Marketplace for $100 — just took a two-hour round trip drive to go pick it up.
Below is my initial Photoshop mockup of what I wanted to do with the kitchen. Sink centered under the window, shaker cabinets, and wood shelves over the windows. I had this odd 4″ left-over space on the right that I wondered if I could turn into some sort of storage for cutting boards/cookie sheets.
Meantime, I’m living in the space and demoing the kitchen to make way for the remodel. My Ikea shipment arrived a day or two before my helpful friend could come to disconnect the plumbing so I pushed everything to the sides of the room and patiently waited. Meantime I used my boxes as countertops when I cooked in my Instapot. I used paper plates and washed my pans in the bathroom sink. One busy workday, I even used the newly assembled cabinet drawers in the living room as a makeshift table.
The work begins
The space on either side of the windows was just a hair too small for my 30″ wide cabinets. My handy-woman, Tanya, reduced the width of the window trim so that there would be enough room for them. I hung the top rails. I recruited Tanya to help me install the top cabinets.
My first job to install the bottom cabinets was to patch the wall and try to make it smooth. The old wall bows here and there and everywhere, so I had to shimmy the cabinet’s track against the wall. The beauty of Ikea’s rail system is that if I hang the rail level, my cabinets will be level. The plastic feet for the cabinets are put on afterward and aren’t used for leveling, unlike other cabinets where you use the feet to level the front and back. Assembling the cabinets was easy. Except for being bulky, they were easy to move, pick up and place on the rail. However, I ended up with a couple of small issues I had to resolve to make everything fit perfectly. One issue was that once the cabinet drawers were installed, I realized that the drawer butted up against the refrigerator door’s handle. This required removing the cabinets and reinstalling them a couple of times to make everything fit perfectly.
Countertop install and refrigerator leveling
I was nervous about using a jigsaw on my new countertop and keeping my lines straight for the sink. My friend, James, to the rescue! He cut out the sink’s hole for me.
He also helped me level the refrigerator. The front feet sat on the tile which is higher than the sub-floor under the cabinets which caused the refrigerator to sit at an angle and interfere with the top cabinet’s doors—the height of the refrigerator just barely fits in the space. The feet wouldn’t shorten enough, so we ended up removing them and now the refrig sits level.
Cabinet gap filler solution
Ikea’s countertop’s length and the width of the cabinets left me with a gap at the end. I thought I would come up with a creative solution for it but that wasn’t happening very quickly. My interior designer friend, Brad, told me that I could buy a longer all-wood countertop at Southeastern Salvage. Though I hated the thought of paying for two countertops, in the end I decided to buy a longer countertop and sell the first one. We had cut a sink hole in the first Ikea countertop so I was only able to sell it for half what I paid for it. Costly mistake, but it worked out for the best in the end. The new countertop was cut down and had to be fudged a little to get it along the end wall that was a bit wavy. And then my friend, James, once again, cut out a sink hole for me.
For the gap at the end of the cabinets, I purchased the smallest cabinet I could buy which is 12″ wide by 24″ deep by 30″ high. And I bought the smallest drawer cover they sell which is 30″x4″. We cut the cabinet down to about 4″ and installed it without the left side panel (the left side panel would have made it an even smaller space on the inside). We then turned the drawer cover on its side (vertical) and drilled out spaces for the hinge cups. I installed the hinges and added a handle.
Notice the baseboard in the first and last pictures. I had to have Tanya cut down the baseboard trim along the wall so that the cabinet’s door would have room to open.
Countertop and island polyurethaned
This was my first experience with polyurethane. Thankfully it went fairly smoothly. I borrowed a friend’s sander and spent lots of time sanding and putting on coats of poly. Later, I found a deal on a kitchen island on Marketplace. I bought it, sanded it down, and added poly. It’s a close match.
Cabinet knobs install
Thought I was being smart when I placed masking tape on my cabinets and doors and then measured and marked the placement for the holes on the tape. I drilled my holes and removed the tape, but on one drawer the tape removed the finish (face-in-palm)! On a subsequent trip to New York City with friends, I took a bus to Ikea one morning and bought a new drawer cover panel. I barely squished it into my suitcase for the flight home. Another expense, but I was just glad it had an easy remedy.
Floor gaps
When the baseboards were cut down to allow for the refrigerator door and cabinet door, it left little holes in the floor on both sides of the wall without tile. I bought a small tub of premixed cement and filled in the gaps. The cement is grey and isn’t noticeable unless you’re looking for it.
Plumbing install
My friend, Eric, and his helper, his daughter Lorelei, came and helped me with connecting the plumbing. We had to run the lines for the faucet, ice maker, and dishwasher and install the faucet. He put cut-off valves on each line for each appliance so that if there’s ever a problem, it’ll be super easy to cut off the water source of just that one appliance. Lorelei helped me by adding cabinet caps on the unused screw holes—she didn’t actually last that long doing the tedious task, but I love that she always wants to help.
Convection Oven Install Goof
After purchasing the convection oven, I paid a handyman $100 to install it for me. Later on down the line, my friend James helped me install the trim piece along the cabinet’s wall and down along the convection oven. After he left and when I opened the oven to use it that night, I found a big problem! The convection oven was not designed by Ikea. It was not made for these cabinets and trim. The trim piece was in the way of the door opening. (See video below.) Another “oh no!” moment! Eric came to the rescue a few days later and helped me move the convection oven out from the wall to accommodate the door. Now the door opens without interfering with the trim panel.
Pantry Door Color Decision and Install
With all the neutrals in the kitchen—white, grey, stainless steel, and wood—I thought the pantry door should be a fun color. I took out masking tape and ran a couple of strips down either side of it. I first painted the masking tape red and then stood back and took a look. I thought it might be too bright. Next, I repeated the same process but this time in a really deep blue. I still wasn’t loving it. In the end, I decided that the wood pantry door was similar to the wood countertop and I should just stain the door and a matching stain color. I later found other ways to provide the pop of color that I was looking for in the space by painting the island legs red.
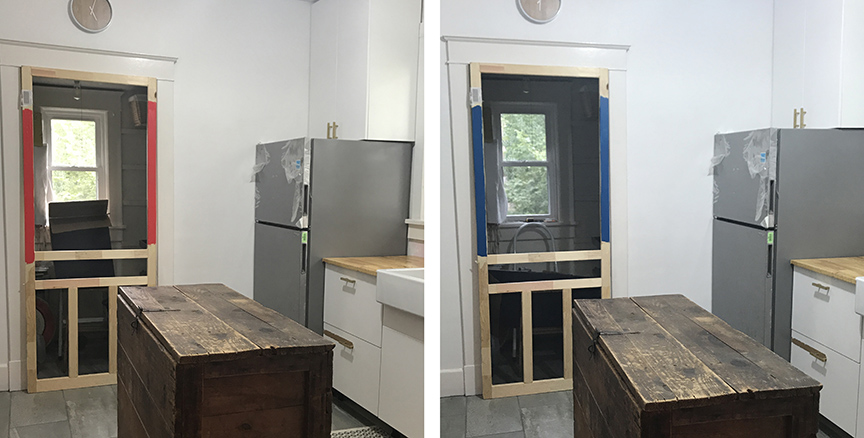
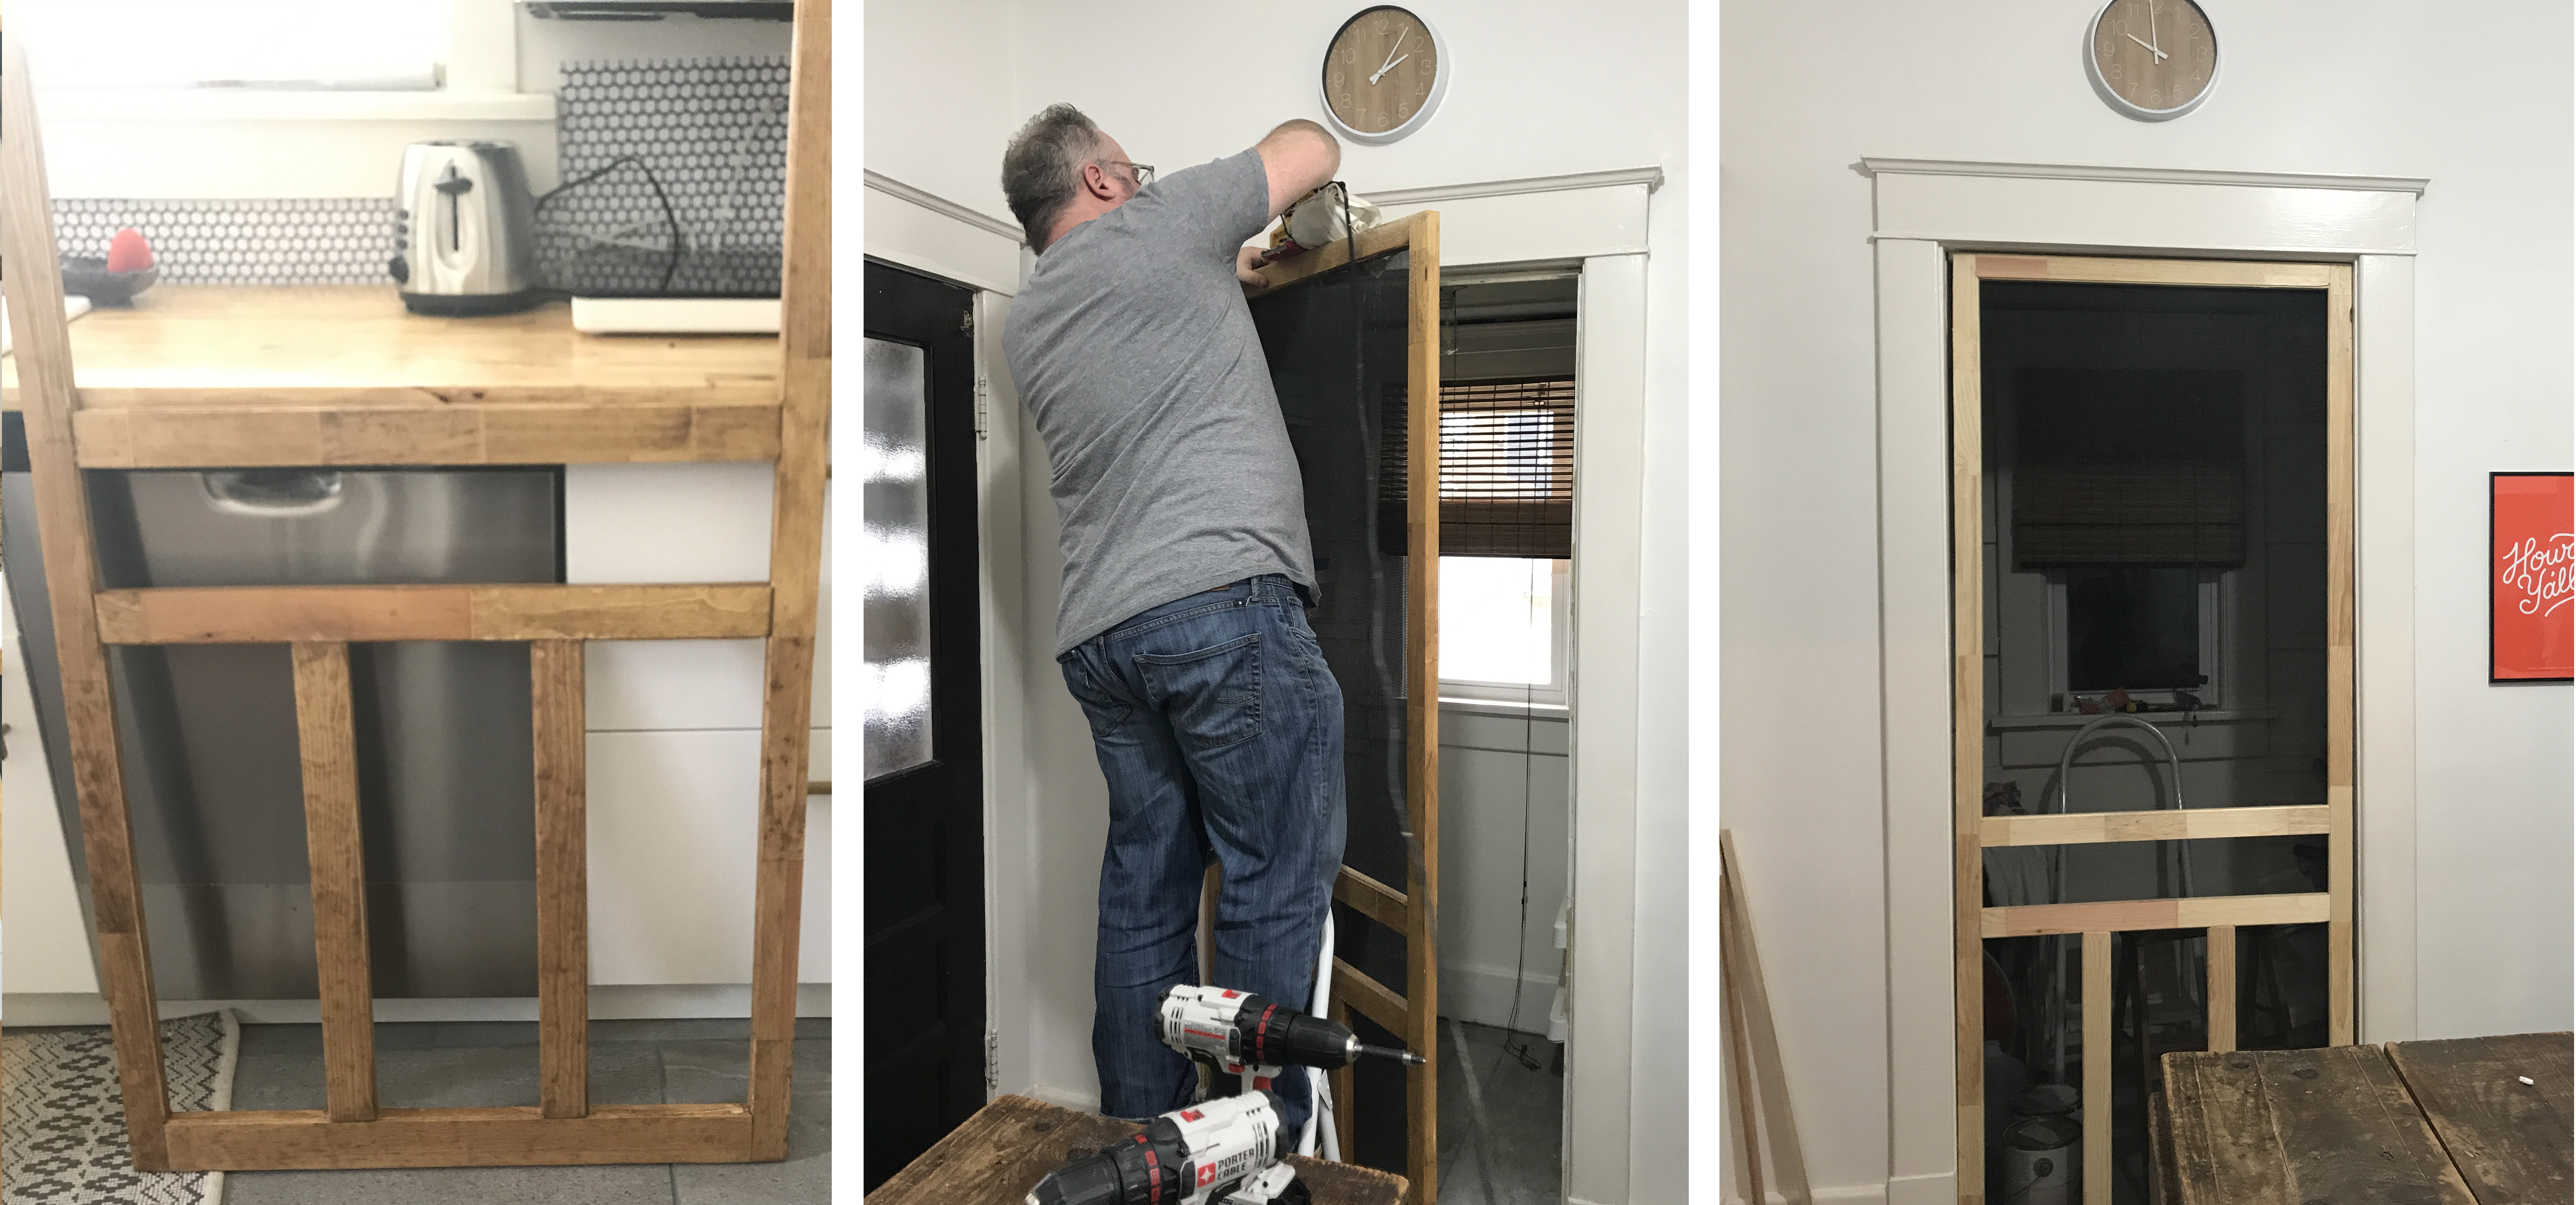
When I chose a screen door versus a solid wood door, it was so that the light from the window would shine through. However, I didn’t want the items in the pantry room to be on full display. I took the screen door to my local hardware store and asked them to re-screen it with a darker screen. (See the difference in the screen color from the first image below to the last image.) When it came to hanging the door, the old house’s pantry door frame wasn’t perfectly square. James used a sander and sanded the places down where it was sticking out until it was diminished and we could shut the door. Later I applied a brass handle and a simple spring to hold it closed. I love the sound of the door snapping closed. It’s a nostalgic sound; a reminder of my grandparents’ screen doors.
My very first backsplash install
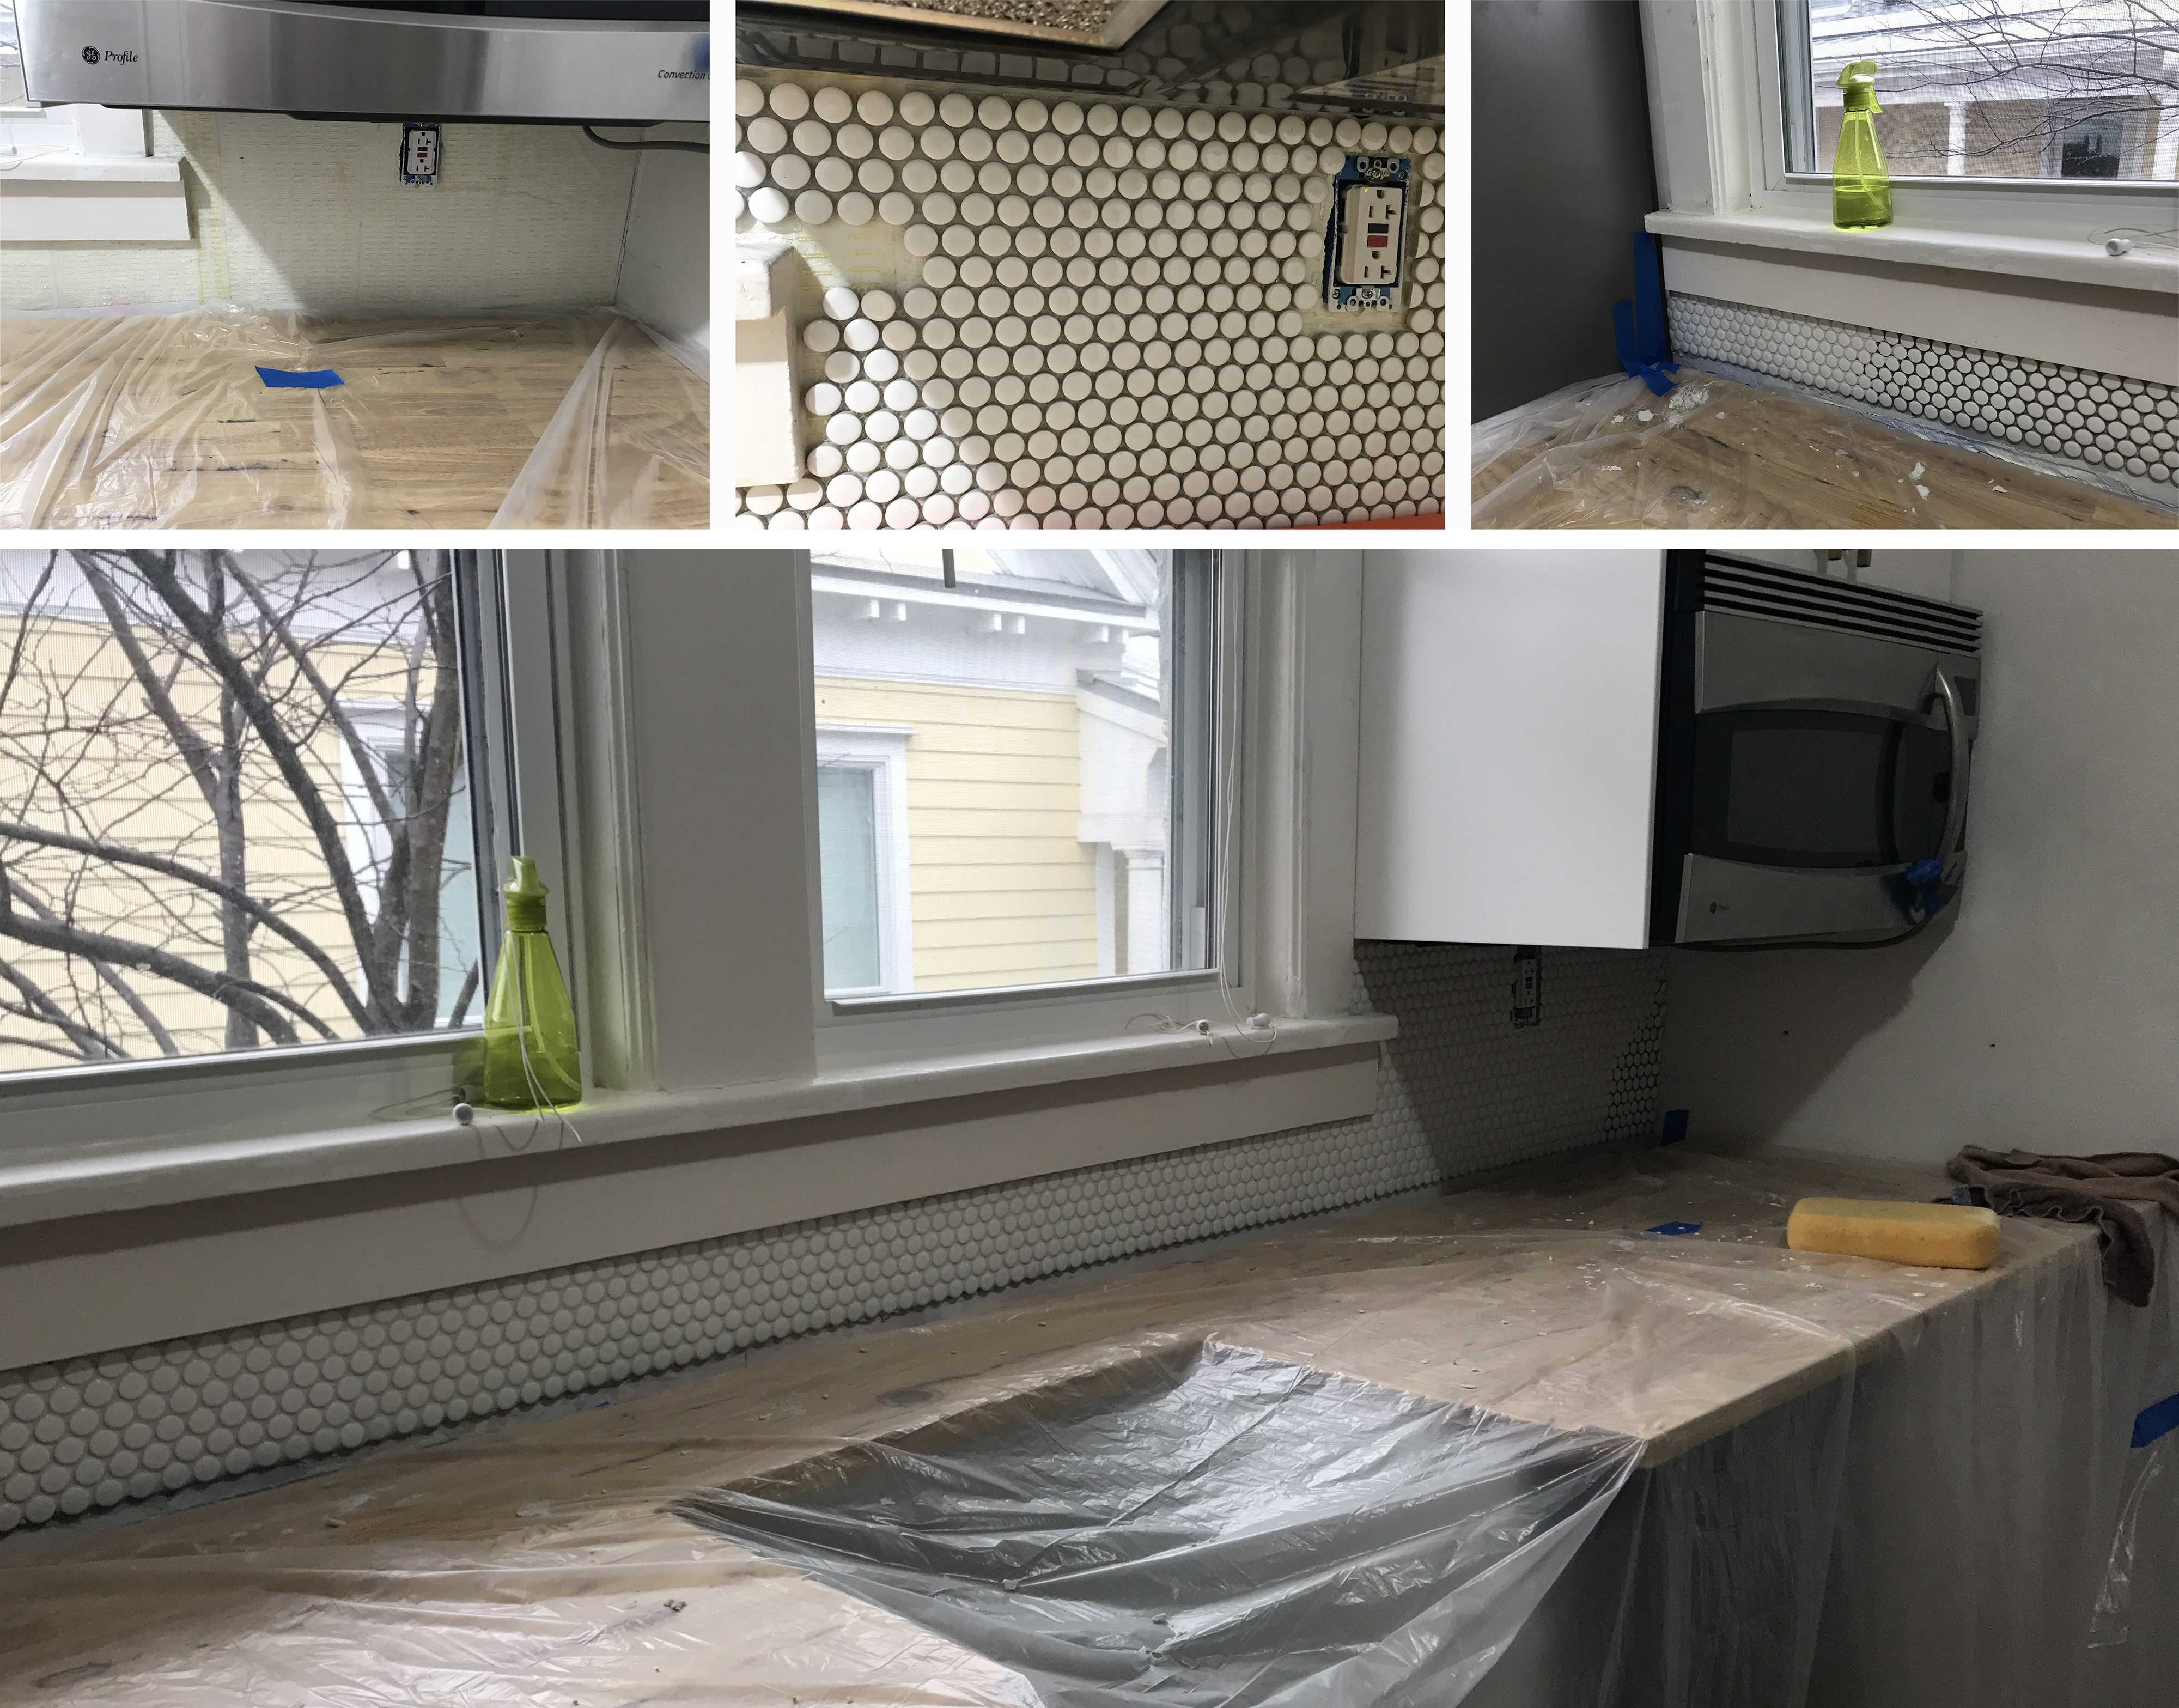
I recruited another friend, J.D., to help me with my first backsplash install. I think I needed a friend most of all for moral support, but also the second set of hands proved crucial. I applied SimpleMat to the walls which is essentially double stick tape. It has an adhesive back and then the front side has a raised adhesive (first image below). I was then able to immediately apply the 12×12 sections of tile. This is where I needed two sets of hands. The tile was penny-size pieces on a flexible web background. The tile webbing flexed and laid down over my hands as I tried to apply them. Most of the time it took all four hands to get the entire sheet of tile lined up and applied to the wall without it moving around. To fill in the gaps around the outlet and windowsill, I cut individual tiles in half. The next step was to apply grout to the tiles and then sponge them off to remove any grout that was on them before it had time to dry. I did a section at a time and moved fast. I think we did a pretty good job for our first time. Thanks J.D.!
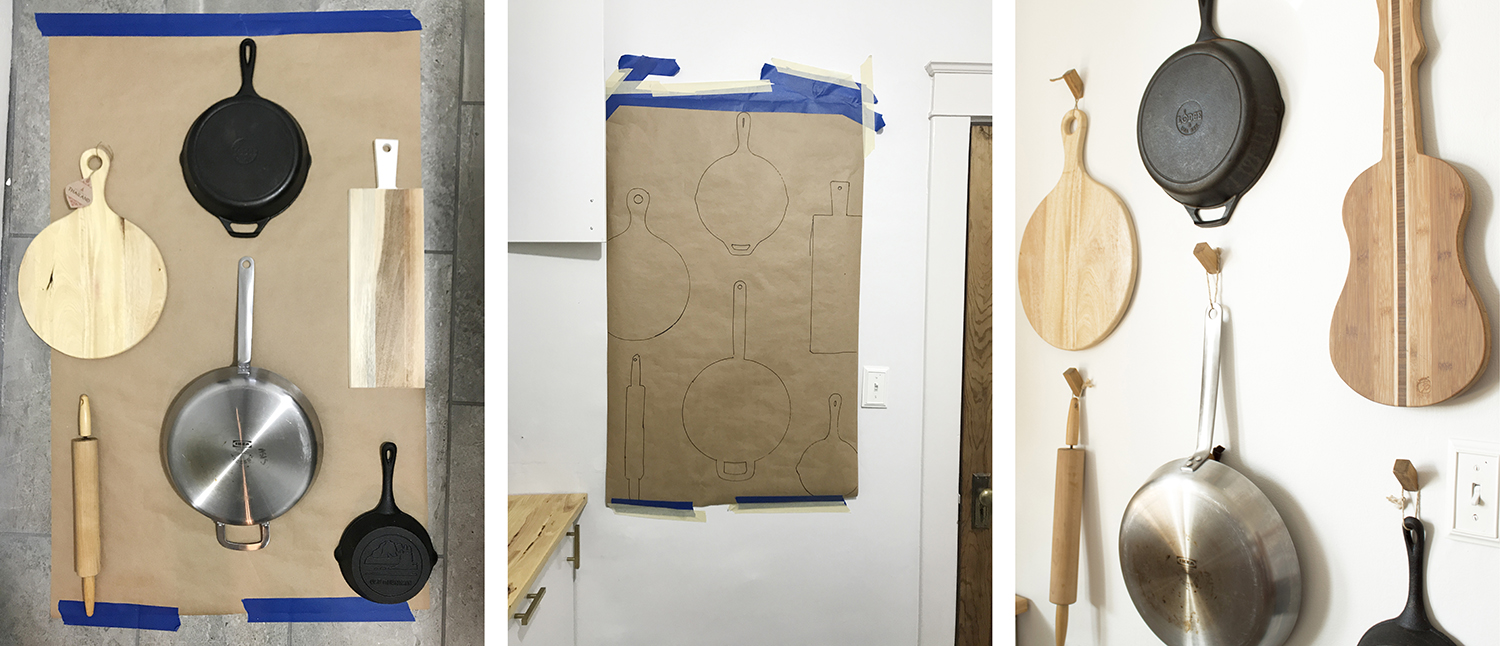
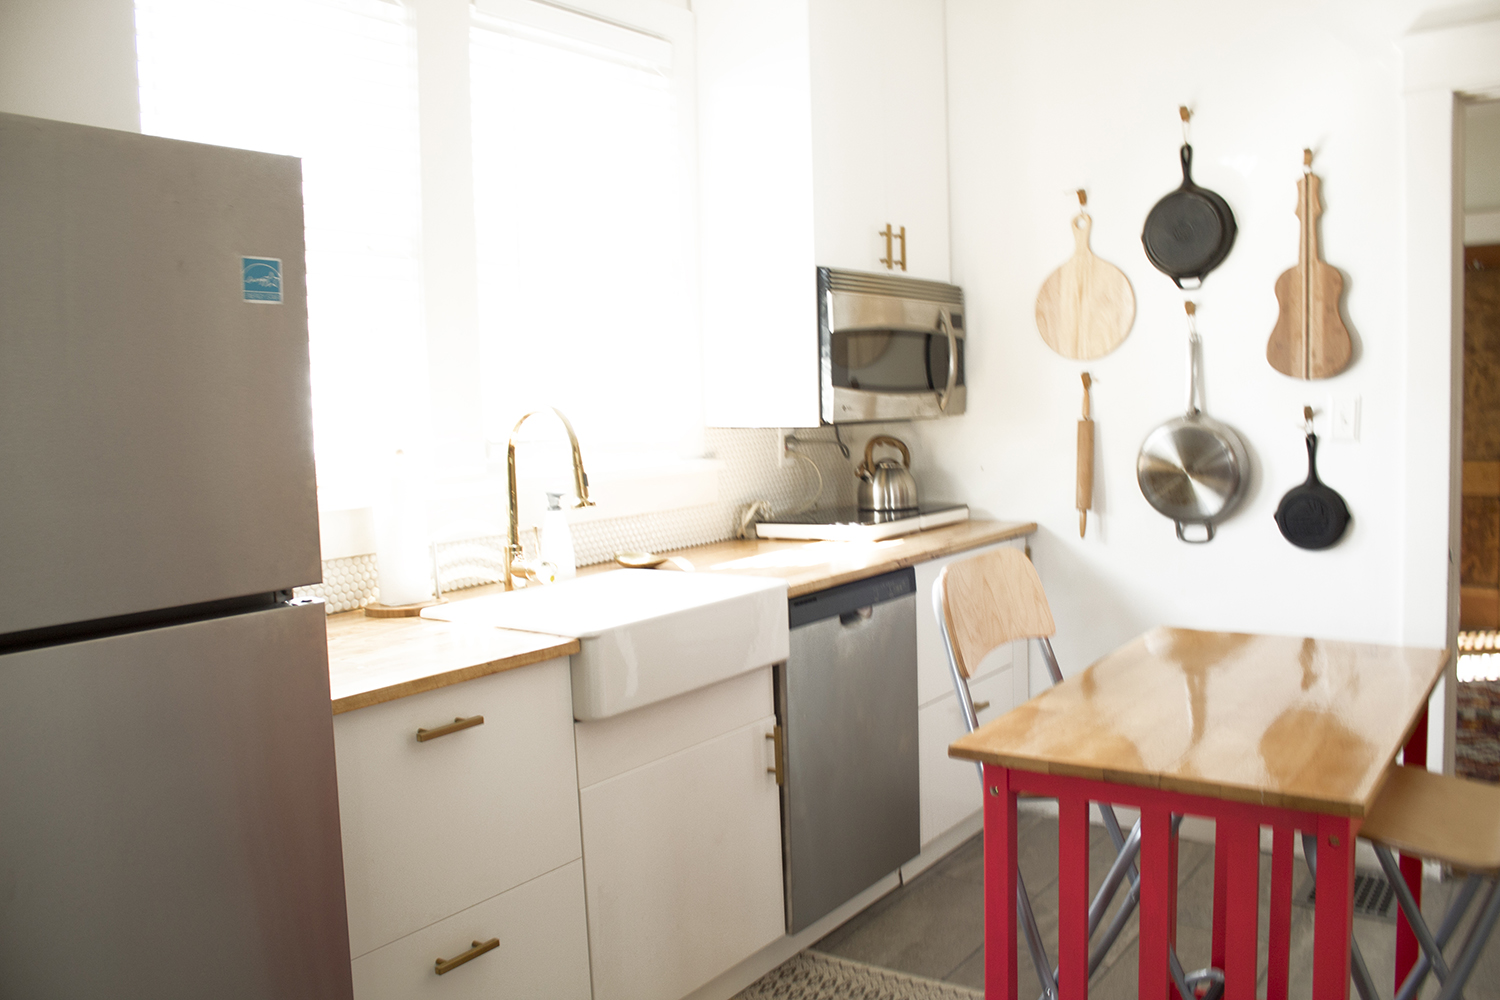
Wall-mounted pans and cutting boards
I love the look of pans and cutting boards on the wall. To achieve the look. I figured out a layout that I liked using my pans on top of brown paper on the floor. Traced around each item and then hung the paper on the wall with tape. In image two below, you’ll notice that I also tested opening the cabinet door to be sure it would not collide with the cutting board. I made nail holes for each item, later replacing each nail with a wood hook that I made from scratch. Further in the remodel, I found this mandolin-shaped cutting board. I thought it was a fun, subtle way to represent that this space is in Music City.
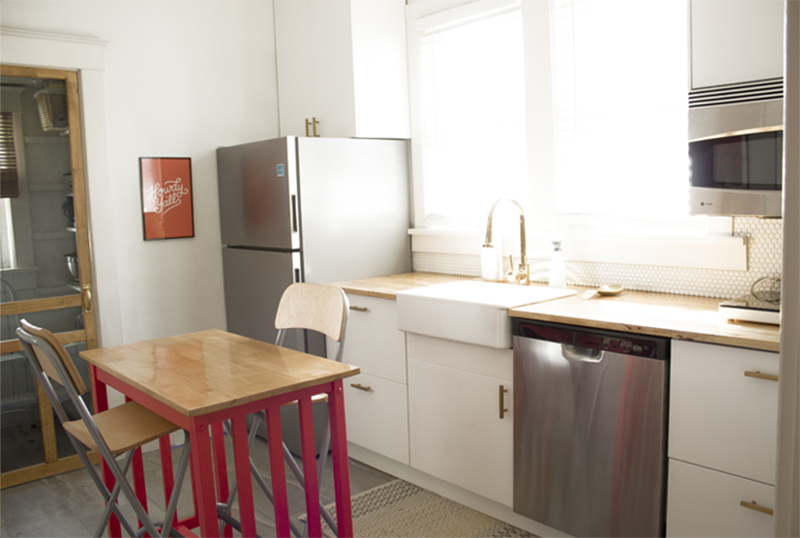
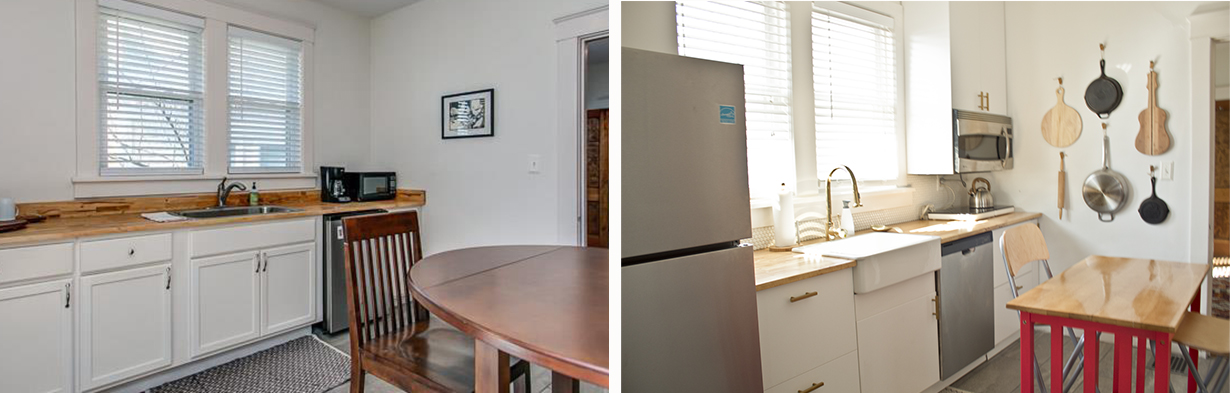
The before and after
Here are picts of the before and after. Lots of work, but worth it. I love how the kitchen turned out!
Great job Linda!