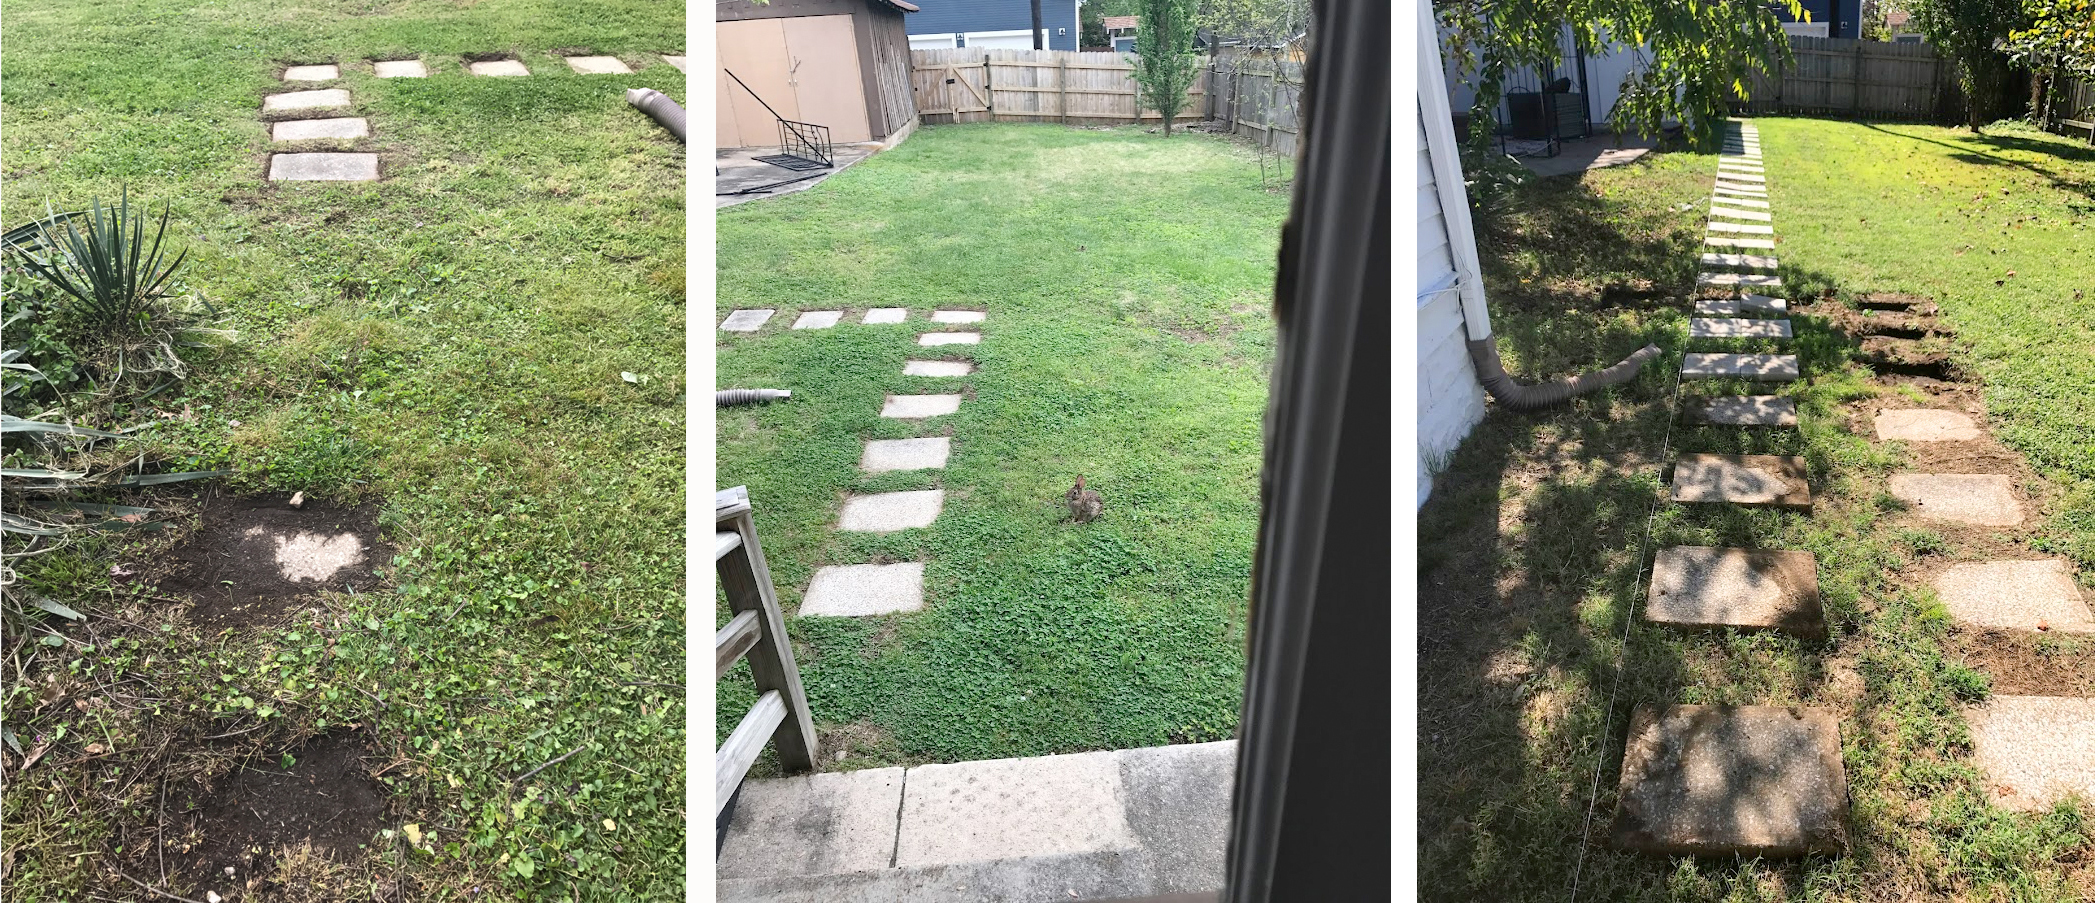
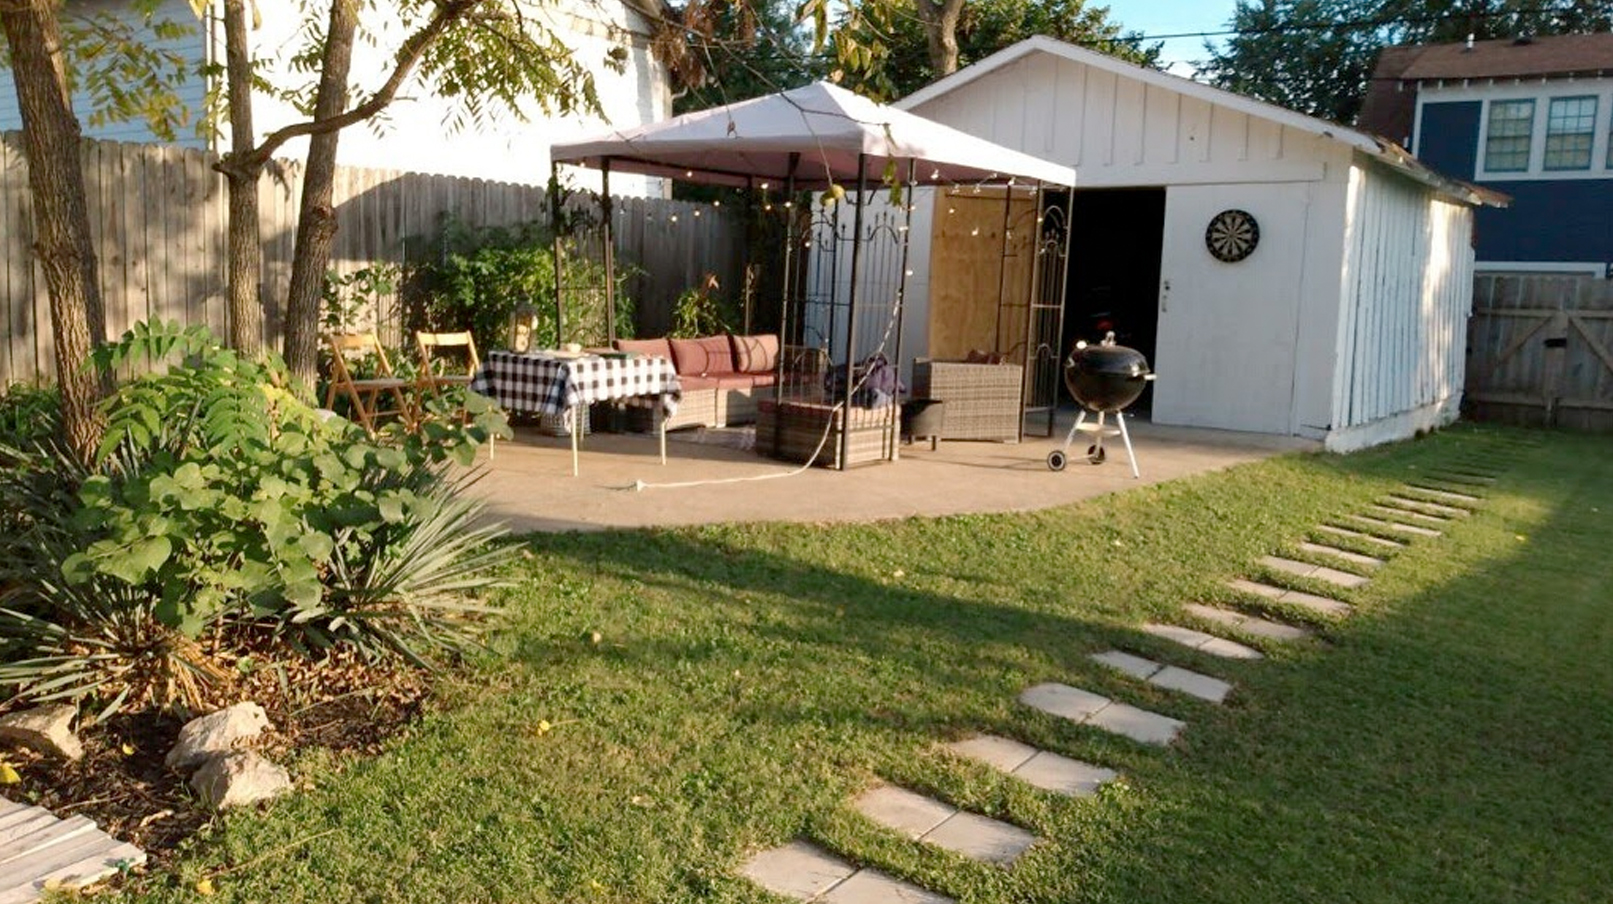
When I moved into the house, there were stone steps in the backyard that made a 45° turn and led to the patio. In October 2019, I removed the ones that turned left. I spent my birthday money and bought more stones. I then came up with a plan, placed a string line as a guide, and laid the stones all the way to the gate. I paid a landscaper to dig up the ground and place the stones for me.
Then came COVID with Stay at Home orders in 2020. Staying at home was isolating, but also gave me more time which led to more home improvement projects. The additional time at home, allowed time for yard projects—projects I may not have been inspired to do or gotten around to doing otherwise.
Not only was this during the height of COVID, but it was also shortly after Nashville’s March 2020 tornado. My yard was only three blocks away from the path of the tornado. My yard was full of debris from other people’s houses and roofs but was otherwise ok. My friend’s house was directly in the path. A huge tree came down in their backyard/against the house, their fence came down, and their house’s windows broke. Thankfully, the owners, Eric and Mandy, and their family were all ok. (Though they all had PTSD from the trauma that they had lived through.) Thankfully, their church friends came and helped them immediately with cleanup, power was restored in a week, and then they proceeded to work on fixing everything. When their new cedar level-topped fence was built, all the tops of the boards were cut to the perfect height leaving small boards approx. 25″-30″ in size. Eric asked if I could use some of the boards for a project.
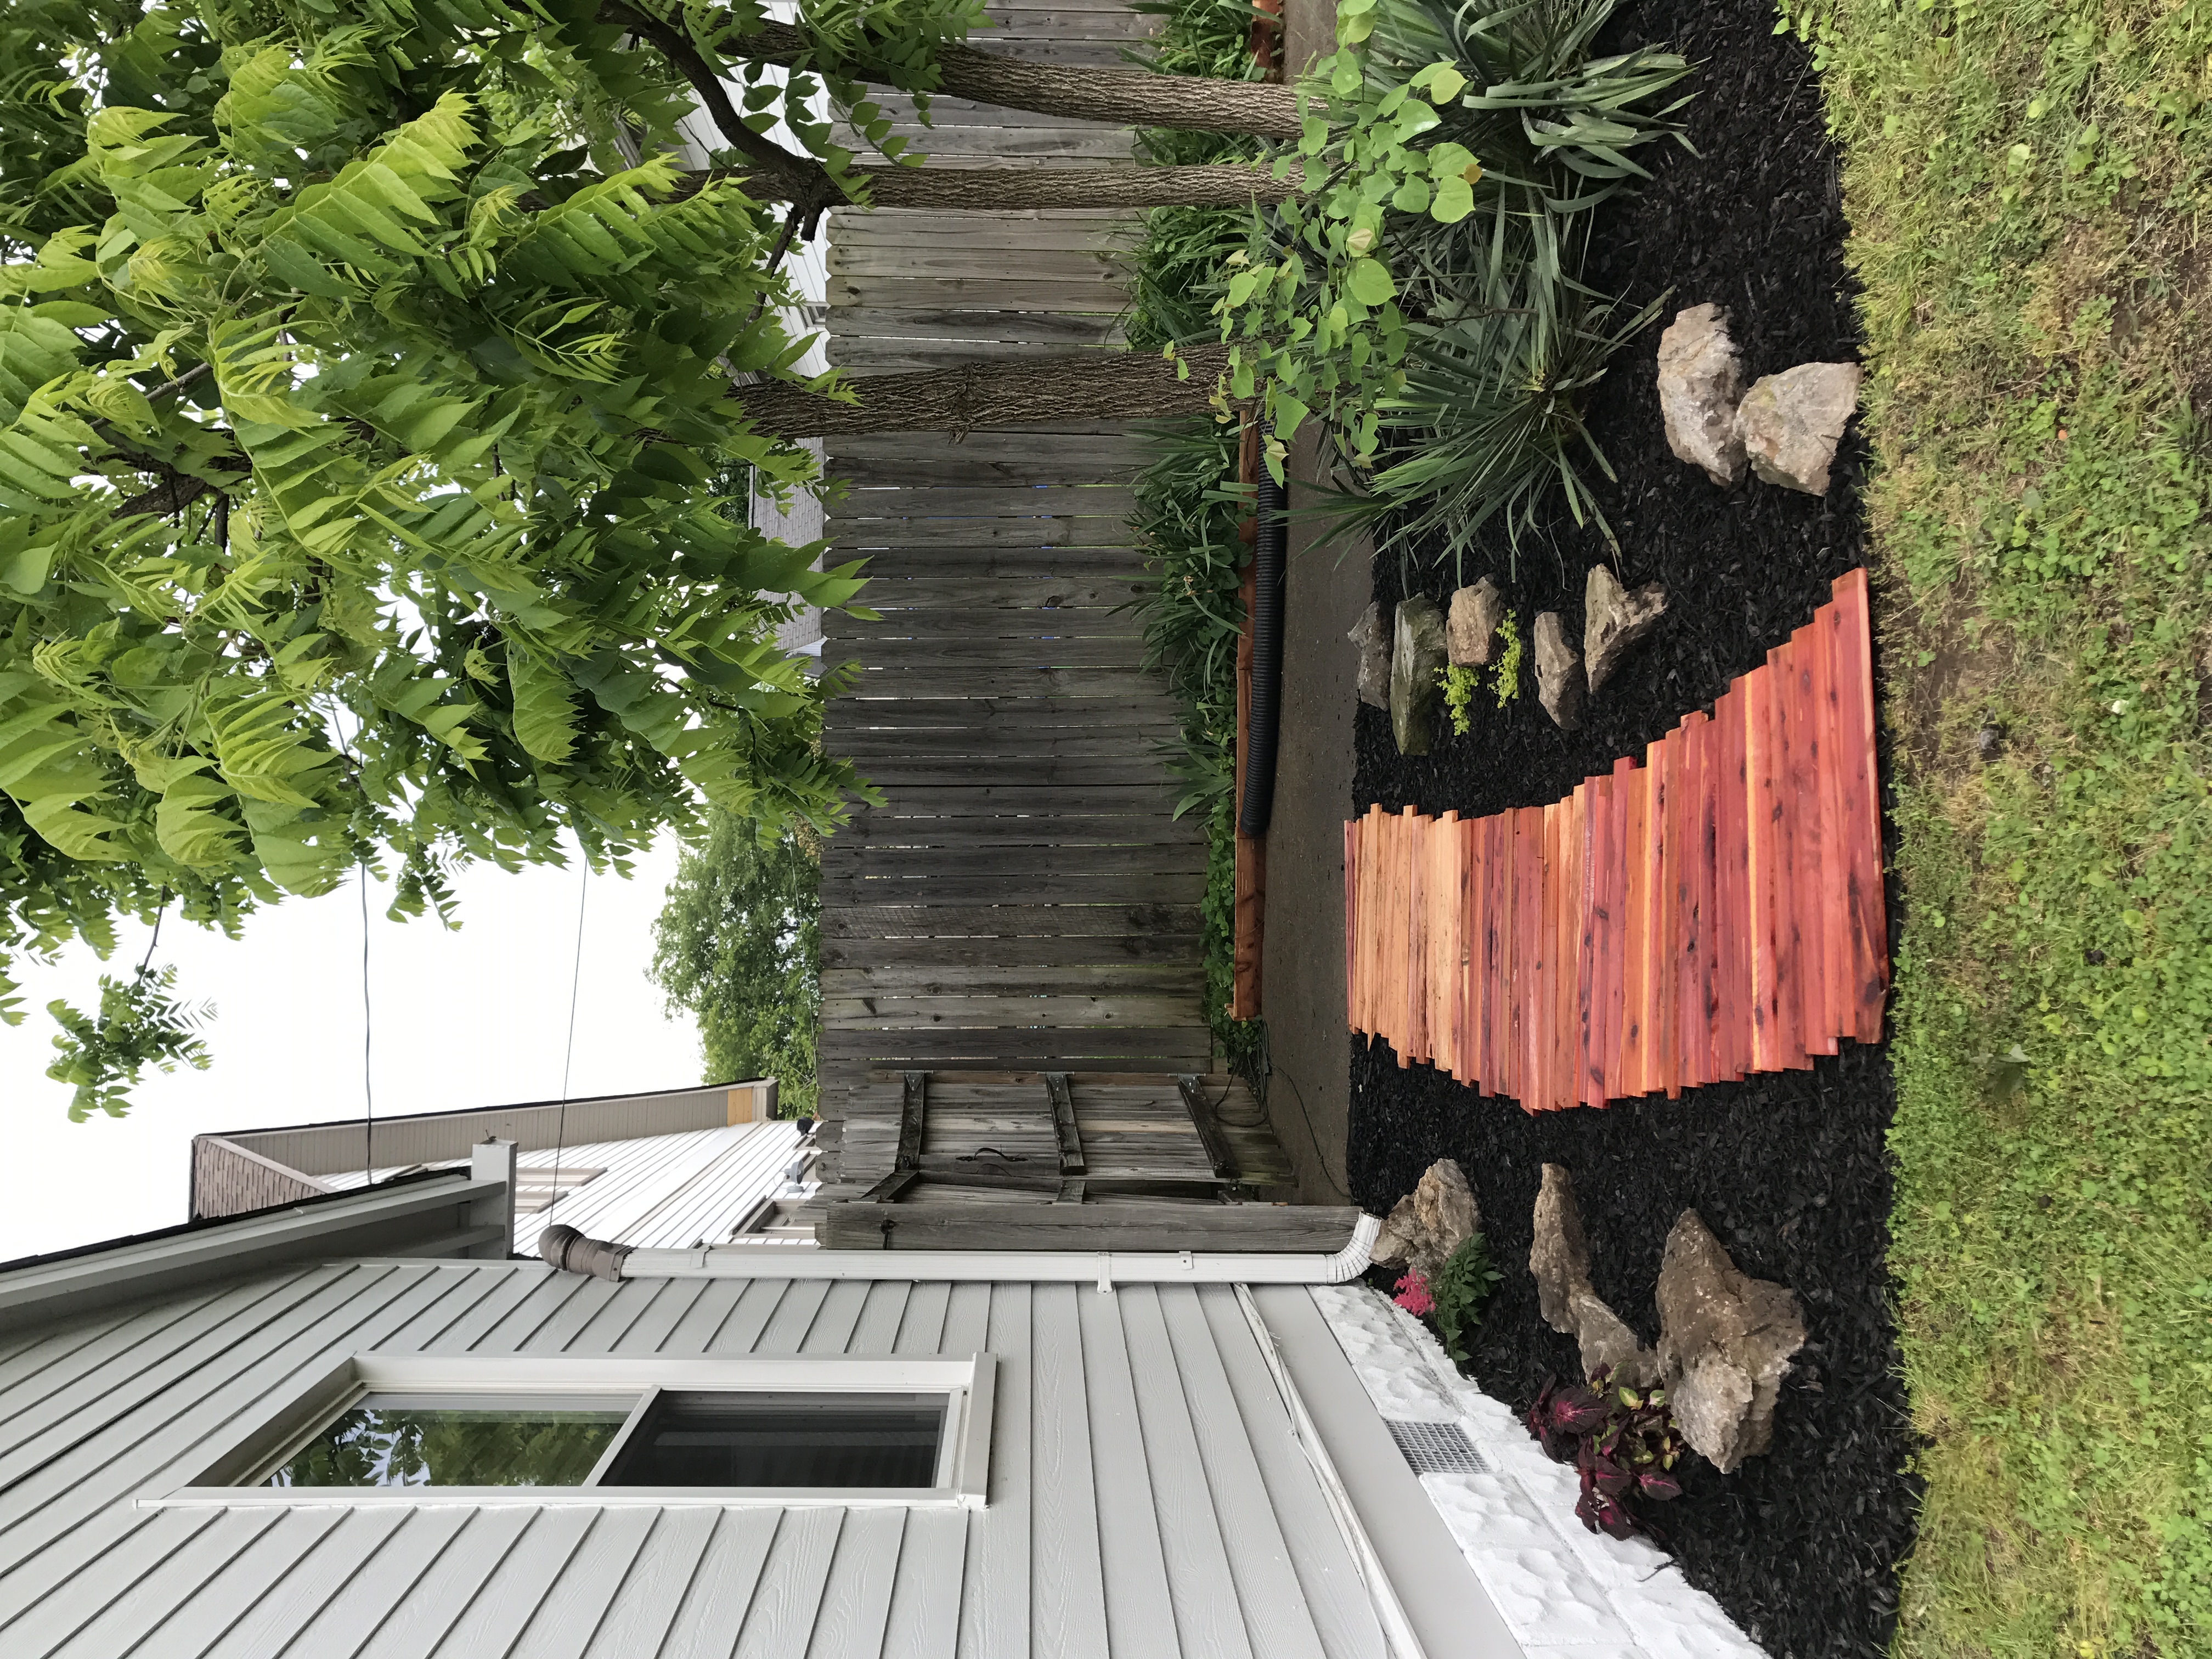
I had been on Pinterest and knew what I would like to do to fill the space that I had removed the pavers from. I gave the unused/ugly spot in my yard a beautiful new pathway. Eric even went so far as to cut some of the boards in half for me. Below was my process.
The project spot is shaded by a walnut tree and the grass hasn’t grown well here.
I started by digging up the weeds along the edges and then laid down cardboard/paper sacks which I covered with black outdoor fabric. (I’ve since realized that using old plastic shower curtains keeps the weeds out much longer so is a better option.) I planned to use black mulch and chose to cover everything up with black outdoor fabric to keep any cardboard from showing through, as the mulch moves around some due to rain and weather.
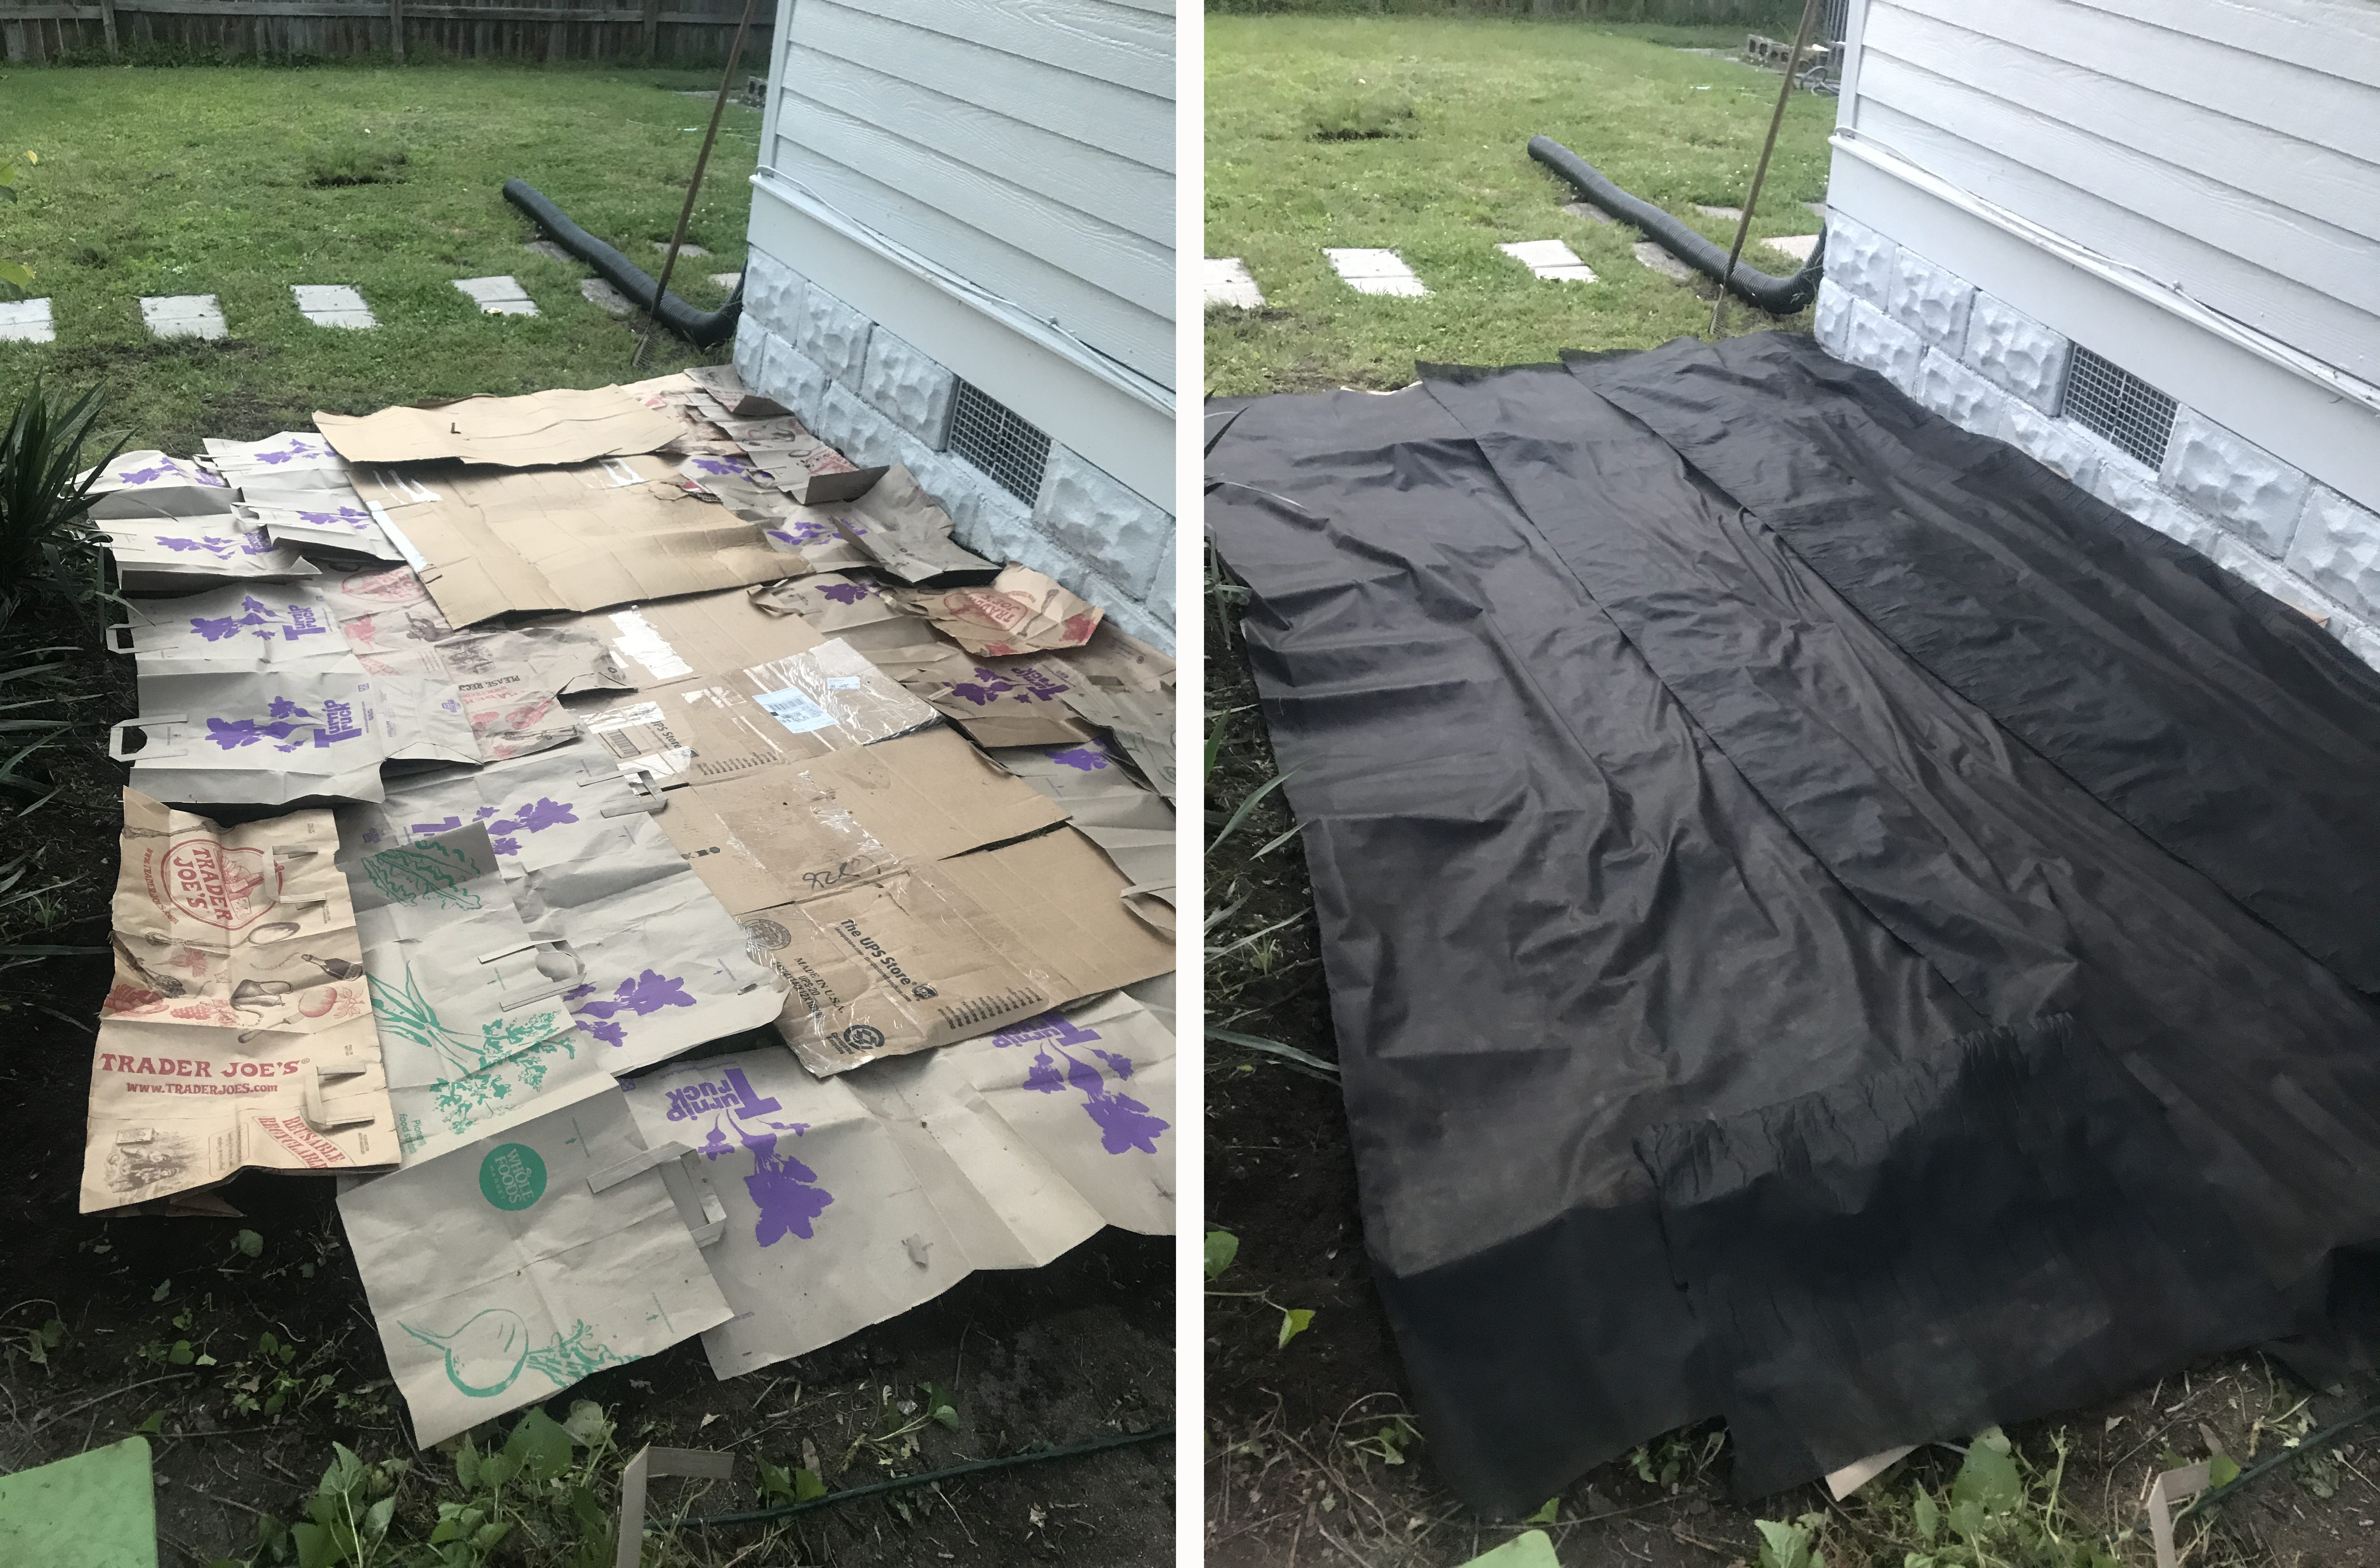
I found someone selling large rocks on Marketplace for $1.00 each. I strategically laid out the rocks I bought and used garden staples to hold down the fabric edges. After deciding on plant placement, I cut X’s through the fabric and cardboard and dug up holes and planted the new plants. The next step was covering the fabric with mulch and placing the boards for the path.
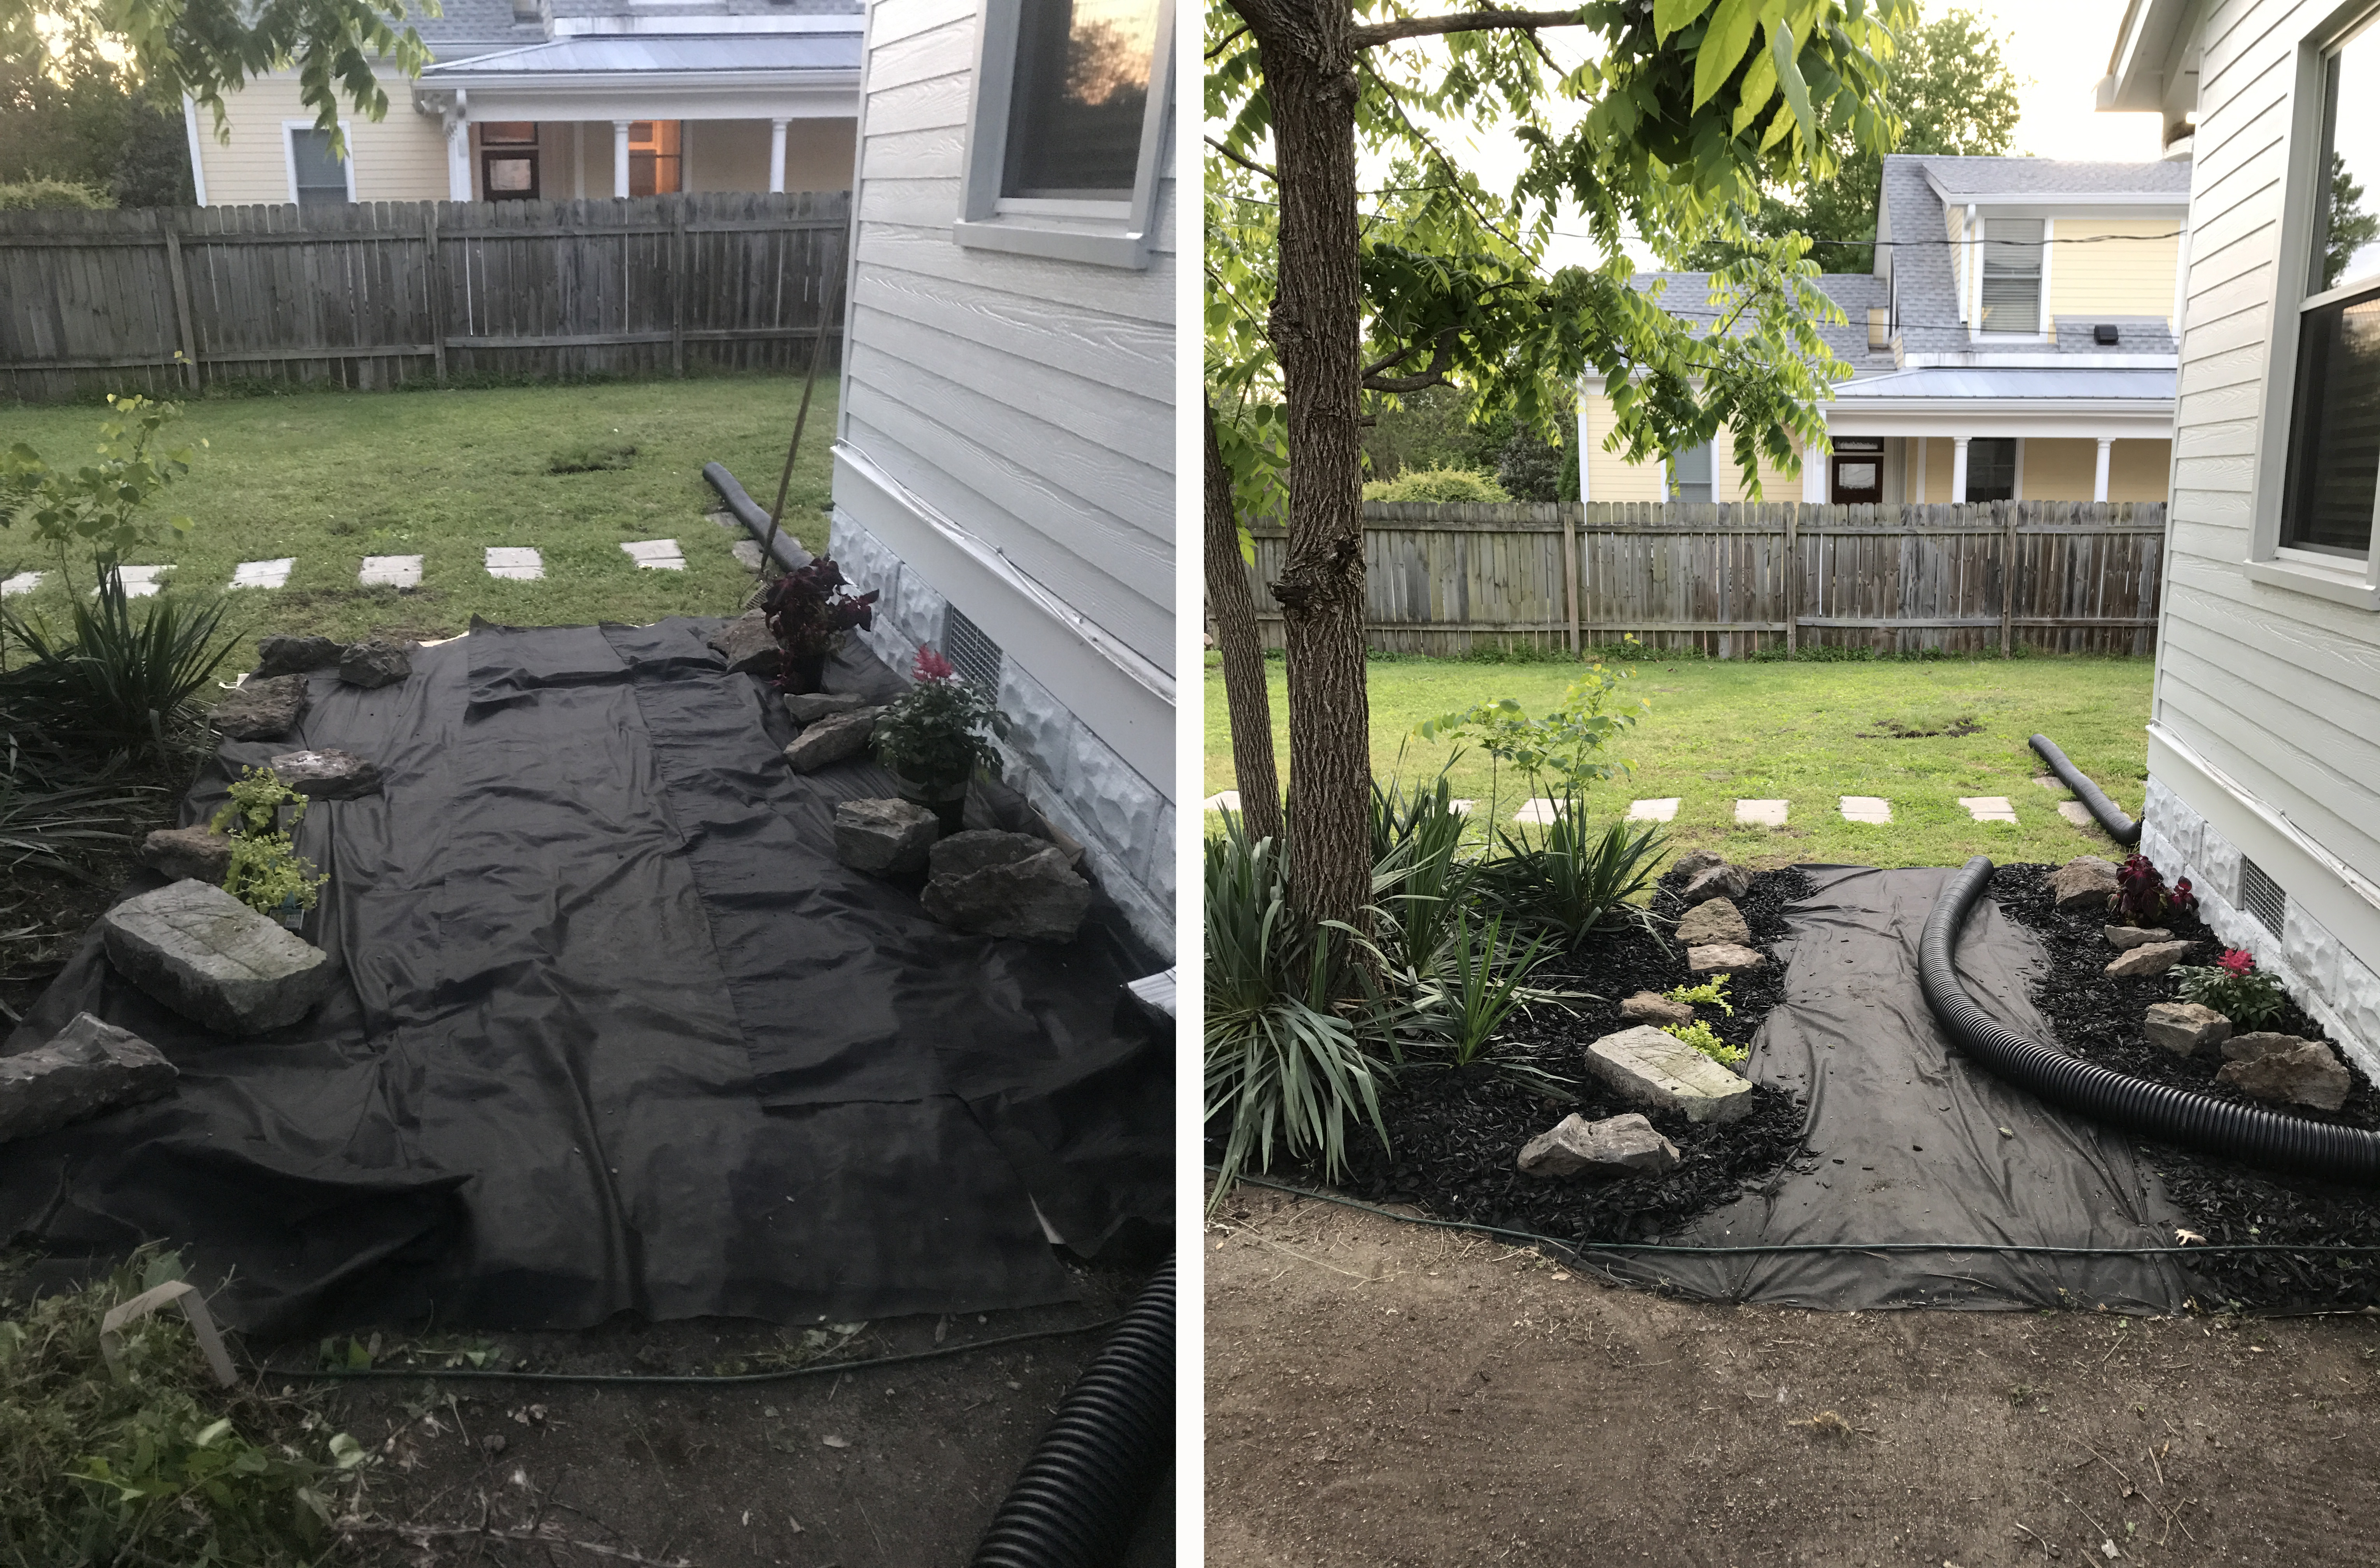
I debated about how to keep the boards from moving since it’s on a small incline. I ended up only using two garden stakes at the bottom of the path. The stakes are not a trip hazard and the path doesn’t shift that much when walking on it. Overall, I am so pleased with how this turned out!
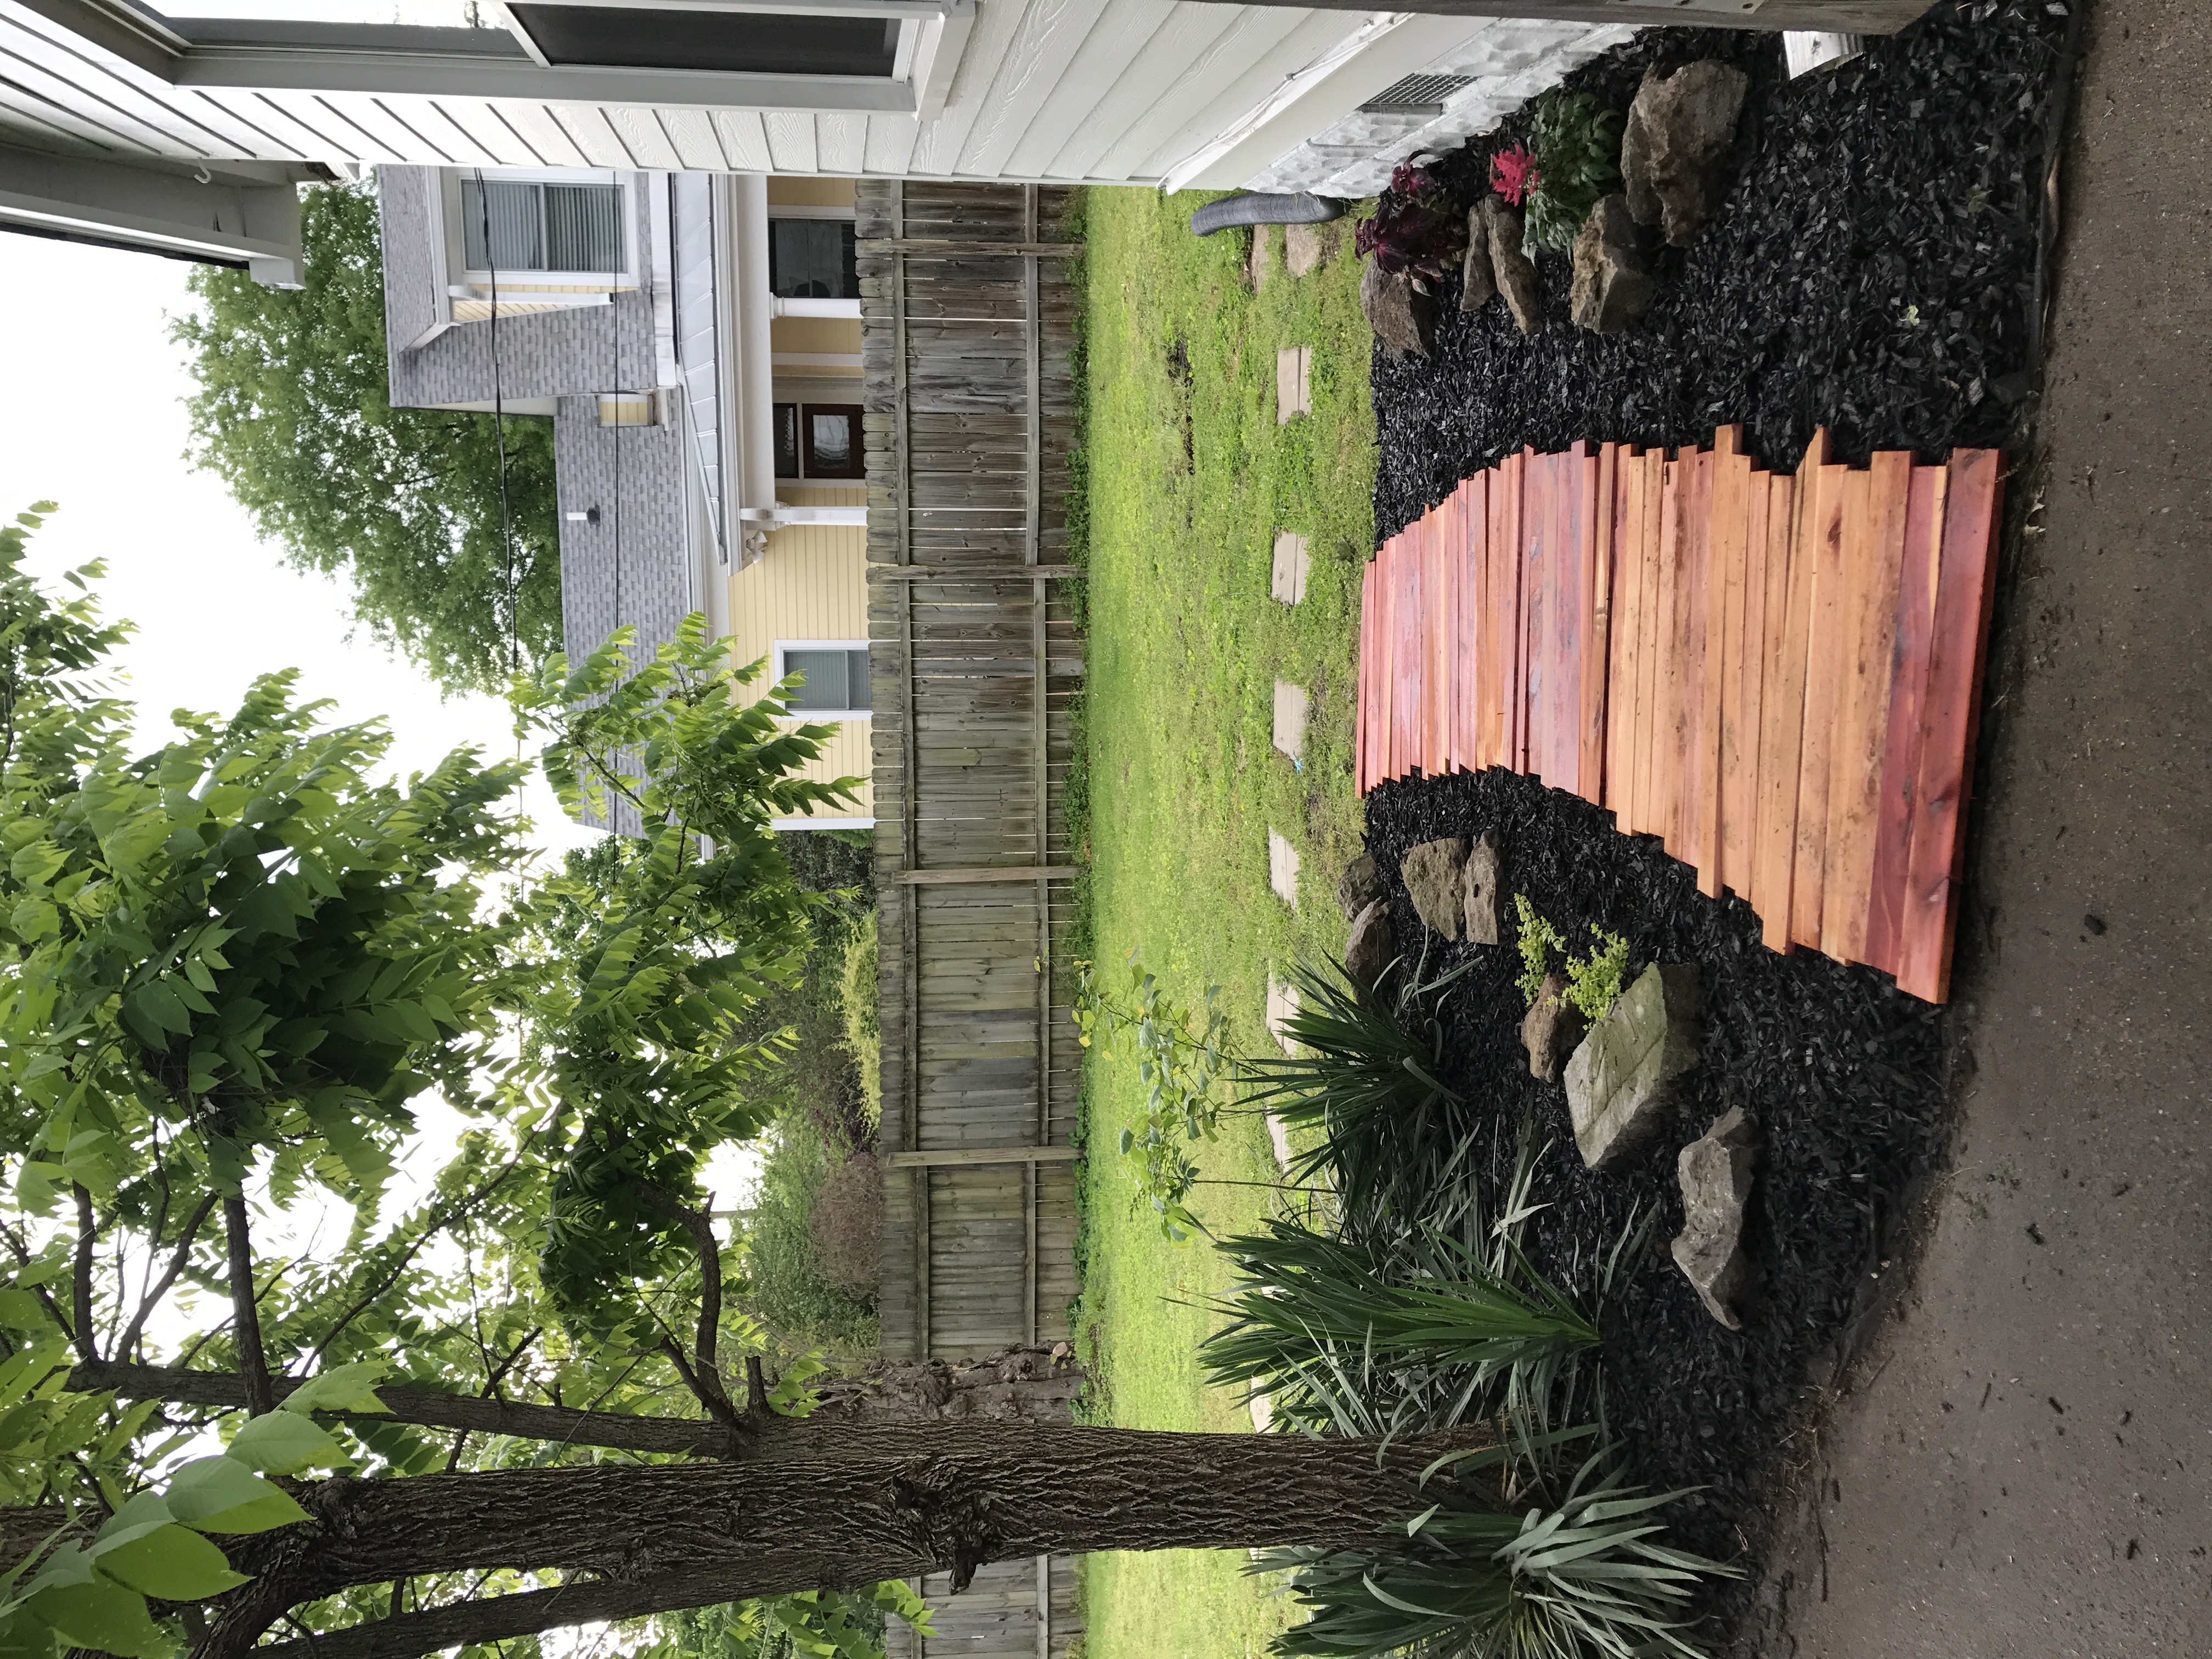
Though it took some planning and work to find the items I needed, in the end it wasn’t a complicated project.